Tuesday, October 9, 2012

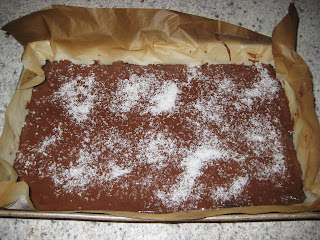
Chocolate Rough Slice


Ingredients
125g melted butter
1/3 cup white sugar
¼ desiccated coconut
1 cup SR Flour
2 tsp cocoa powder
1 pinch salt

Method

1. Preheat oven to 180C.
2. Line slice tin with baking paper
3. Sift dry ingredients into a large mixing bowl


4. Add sugar and coconut


5. Stir in melted butter. Mix well until combined.


6. Press mix into the lined tin, ensuring it is right to the edges and even


7. Bake 15mins or until just starting to colour

8. Cool and ice with either plain chocolate icing, melted chocolate or chocolate ganache, and a sprinkle of additional  coconut,if desired.


9. Allow to set before cutting into squares


Tuesday, August 14, 2012

Spicy Sticky Wings

Ingredients:

1 kg Chicken wings
1 tbs sweet chili sauce (add more or less, depending on how spicy you like things)
3 tbs hoi sin sauce
3 tbs honey
3 tbs Kajup Manis (Indonesian sweet soy)
1/2 tsp grated ginger
1/2 tsp crushed garlic (or 1 small clove)
1 tbs lemon juice (orange juice can be substituted)
1/2 tsp sesame oil

Method:

1. Combine all ingredients, except chicken, in a large bowl. Mix well
2. Trim wing tips from chicken and discard (or save to make stock or soup)
3. Add chicken to marinade and stir well to coat.
4. Cover and refrigerate (preferably over night), stirring every few hours
5. Preheat oven to 180 degrees
6. Place chicken in oven tray and bake for approx 1.5 hrs. Turn the chicken after 30mins and baste with marinade
7. Serve as finger food at a party, or with some rice as a main meal.
 
ENJOY!

Thursday, August 9, 2012

Yummy Roast Chook

This is my favourite way to make a roast chicken. There are lots of different ways, but this is the way I usually do it, and always with good results.

Ingredients:

Size 18 Chicken (or do what I do sometimes and get 2 little chickens with a combined weight of 1.8-1.9kg)

Lemon Pepper seasoning - I like the Masterfoods one.

Roast chicken seasoning (which is a combination of paprika, onion powder, garlic powder, chicken stock powder, a teeny bit of chilli powder, salt, sugar and pepper). Again, I use the Masterfoods one.

Olive oil spray (or if you can find it, one flavoured with garlic)

1 tablespoon soft Butter

1 whole Small onion, peeled,

Bamboo Skewers


STUFFING (combine the following in a big bowl):

Fresh bread crumbs from 4-5 slices of day-old bread with the crusts removed

1/2 red capsicum, diced finely

Large onion, diced finely

about 2 teaspoons Mixed dried hard herbs (Thyme, rosemary, marjoram, sage anything you like really, as long as they are good quality and have a nice robust flavour. Steer clear of parsley, basil and coriander leaf)

1/2 teaspoon of lemon pepper seasoning

1 teaspoon lemon juice

1 tablespoon very soft butter (or margarine, if you must)


Method:

 1. Clean you chicken. Remove any of the crusty skin that you sometimes get around the chicken's "ankles", be sure and remove any stray feathers, and rinse out the cavity with running water and pat the skin dry with paper towel.

2. Place a cake rack in a large baking tray. (If you have a specifically designed roasting rack and tray, use that). Put water in the tray to JUST below the level of the rack

3. Take the chicken and use your finger to make a little pocket at the neck of the chicken into the breast between the skin and the flesh. Shove the butter into the little pocket and "smoosh" it around so the butter spreads all over the breasts

4. Turn the chook so its legs are pointing to the sky and the cavity is open and you're ready to defile that there bird. Pack the stuffing in the cavity nice and firm. (if there is any stuffing left over, form it into a ball and wrap it in foil, like you would do to a jacket potato. It can be roasted on the rack beside the chook)

5. Take the small onion and shove it up there too as kind of a "bottle cap". Keep the onion in place by skewering through the bum flaps of the chook, then through the onion, then through the flap on the other side.

6. Place the chook breast side up on the rack, spray with oil and sprinkle with lemon pepper and chicken seasoning

7. Roast for an hour at 180 degrees Celsius, flip over to breast side down, spray and sprinkle, top up the water in the tray if needed and roast for a further 30 mins. Test the bird is done by inserting a knife between the leg and thigh and ensure the juices are running clear. If not, cook further in 10minute intervals until juices are clear. The general rule is 30mins per 500g of roast. This rule also applies to roast lamb and beef too (for well done – medium or rare meat needs about 20-25mins per 500g... but that obviously doesn’t apply to chicken). Don't forget, you need to add a little bit of cooking time to compensate for the additional weight of the stuffing, and the fact you are not getting convection heat inside the cavity of the chicken - the heat is transfered by conduction through the flesh.

8. Remove chook, wrap in 2 layers of foil and let rest for 10 minutes (use this time to finish up the veges or whatever other accompaniments, make some gravy using some of the pan juices etc).

9. Carve and serve.

Tuesday, August 7, 2012

Evil Chocolate Log

DISCLAIMER: This dessert is very bad for you. Don't eat too much of it or you will really regret it. However, it is very easy, very versatile and VERY delicious. If you make it for other people, they will think you are a kitchen god or goddess.

 Ingredients:

300mL Thickened cream
50mL of alcohol – I use tia maria, but you could use port, Bailey's, kahlua, grand marnier (if you wanted a jaffa-type flavour), actually – the options are just about endless
150g fruit jam/jelly/conserve. I like strawberry jam or plum jam, but marmalade would work too (again, the choices are pretty extensive).

Approx 250g round chocolate flavoured biscuits/cookies (NOT chocolate coated biscuits). I use Arnotts choc ripple biscuits, but any substantial biscuit will work.

 Method:

1.        Zap jam in microwave for about 10-15 seconds to make sure it is nice and soft and slightly warm. Squash any big lumps of fruit

2.       Combine jam and alcohol in a large bowl. Mix well.

3.       Place biscuits in the bowl and stir to coat the biscuits in the jam mix. Set to one side.

4.       In a separate bowl, whip cream to firm peaks.

5.       Place a line of cream onto a cookie sheet or long ceramic serving dish

6.       (Now for the really messy part) Take 2 of the jammy biscuits and stick them together with about a teaspoon of cream. Stand them up in the cream line. Take another biscuit and another spoon of cream and stick that to the 2 biscuits on the tray. Repeat until all the biscuits are gone and there is a log-shape of chocolatey goodness on the tray.

7.       Now smother the log in the remaining whipped cream to cover it completely

8.       Whack it in the fridge for at least 4 hours (24 for a cakier texture). NOTE: The longer you leave it, the squishier the biscuits go and the harder it is to serve it in a pretty way

9.       Top with grated chocolate (or if you are feeling particularly slack like I usually am, smash a Cadbury flake up and sprinkle that over the top instead)

    Serve and EAT IT!

Other flavour combinations:

è Ginger nut biscuits with grand marnier and marmalade, topped with a mixture of brown sugar and powdered ginger.

è Chocolate bikkies with cherry liqueur and cherry conserve (or raspberry, if you can’t find cherry). Top with toasted coconut for a cherry-ripe kinda flavour

Monday, August 6, 2012

Mum's recipes

My mum is an amazing cook. She can cook ANYTHING and cook it well. Over the years she has accumulated an impressive array of recipes from innumerable sources. OLD recipes from elderly relatives, books, magazines, friends, my food technology classes at school, tv shows and more recently, websites. Mum has modified old recipes for a modern twist, combined different recipes into one “Super recipe” and flat-out invented new recipes. My goal is to immortalise these amazing recipes as best I can using this blog. I not only want to make sure these tasty morsels don’t get lost to the ages, but also to share the wonderful flavours with all of you. This weekend, I sat down and raided my mum’s recipe book and came up with approximately 40 different recipes ranging from starters to mains, side dishes and sauces to biscuit and desserts. Some are simple, some are complicated. Some are budget friendly (German potato pancakes), some are not (Carpet bag steak). Over the next weeks and months (hopefully not stretching into years!!!), in addition to my normal blogging, I plan to make ALL these recipes (and more), photograph them, then blog about them. I endeavour to include not only the ingredients and method, but also a brief history about how this recipe came to be.


Recipes to look forward to:


Sweet

Savoury

Pavlova (Both crisp and marshmallow centre)

German Potato Pancakes

Pecan Pie

Sweet and sour sauce

Sponge Cake

Canneloni

Cinnamon Tea cake

Pasta Cabonara

Rock cakes

Steak with whisky sauce

Angel cakes

Lasagne

Honey Joys

Carpetbag steak

Cornflake biscuits

Meatballs in tomato sauce

Honey jumbles

Herbed Chicken Marylands

Jam drops

Prawn toast

Mrs Thomas biscuits

Sweet Chilli chicken

Creamy Caramel Sauce

Satay Chicken

Strawberry Yogurt cake

Béchamel Sauce

Lemon Meringue Pie


Raspberry coconut slice


Chocolate rough slice


Maple Fritters


Chocolate caramel slice


Spiced peach pudding


Caramel marshmallow slice


Skywalker scrunchies


Anzac biscuits


Coconut crisp biscuits


Date loaf


Christmas Cake


Traditional Christmas puddings


Carrot cake


Blueberry muffins


Lattice slice


Chocolate mousse


Monday, March 5, 2012

Vanilla Mousse Slice

This is one of those "quick to throw together, everyone thinks you're a kitchen genius" kind of recipes. You whip it up the night before, ice it in the morning and you are set for any event. Morning tea at work? No problem. Visitors coming over for morning tea? You are set.

Ingredients:
1 packet milk coffee biscuits
300mL Thickened cream
150mL Milk (low fat is fine)
1 packet of  Vanilla magic instant mousse
Approx 1 cup pure icing sugar (sifted)
1-2 passionfruit


Method:
1. Place instant mousse powder, cream and milk into a large bowl.
2. Beat with electric beaters until well combined and form soft peaks
3. Line a slice tin with baking paper and a layer of biscuits.


4. Cover with the mousse mixture and another layer of bisuits, trying to keep them in the same orientation (to aide in slicing later)


5. Cover with a layer of cling wrap or foil and leave to set in the fridge for at least 12hours.
6. Mix passionfruit pulp and icing sugar to a nice pourable consistancy and pour over the top of the slice to cover evenly.
7. Allow to set in the fridge for at least 30mins before serving.

A note about setting times: If you have the time to leave it set for 24 hours total, the biscuits will become much softer and more cake-like in consistancy. It will work with a shorter setting time, but it won't be nearly as good. Trust me on this. A slightly longer time in the fridge (if you can resist the creamy goodness) is well worth the wait.

Choc Chip Cookies

Preparation Time
10 minutes

Cooking Time
20 minutes

Ingredients:

    150g softened butter
    1/2 cup caster sugar
    1/2 cup brown sugar
    1 tsp vanilla extract
    1 egg
    1 3/4 cups plain flour, Sifted
    1/2 cup dark chocolate bits
    1/2 cup milk chocolate bits


Method:
1. Preheat oven to 160°C. Line 2 baking trays with non-stick paper.
2. Beat softened butter, caster sugar, brown sugar and vanilla extract for 1-2 minutes or until smooth and well combined.


3. Beat in 1 egg.


4. Stir in plain flour in two batches.
5. Stir in choc bits until evenly distributed.
6. Spoon tablespoonfuls of the mixture into balls and place on the lined trays. Press down slightly.


7. Bake for 15-18 minutes or until light golden and cooked.

8. Transfer to a wire rack to cool. Store in an airtight container for up to 1 week. (Yeh, right! Like they would ever last that long!)


Usually, if I am accurate about the sizing and use a soup spoon full of dough per cookie, you get about 28-30 cookies out of this mix. I got 30 out of the batch I photographed for this and I was quite pedantic about the sizing as I wanted them to look good for the photos. If you prefer bigger or smaller cookies, go for it. I don't do any much bigger than this as they don't fit through the neck of my cookie jar. My husband and daughter pinched one each off the baking tray while I was fiddling with the settings on my camera. (Correction, my husband actually stole 2!)


Variation:
1) Remove 2 heaped tablespoons of flour and replace with cocoa powder. Replace choc chips with white choc bits.
2) Replace choc chips with mini MnMs